Vintage pegs

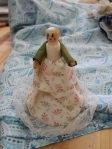
Check out these great vintage pegs. I thought I had every shape going but obviously not!

Thanks to Emma for letting me show them. She found them at a flea market and bought them just because she thought they looked like a family! What a great reason to buy something. I love the one in the middle at the front.

Visit Emma at her blog: Emma Carlow.

Dolly peg project – Lesson five

The hair

You can paint the hair onto the peg as I did the on the doll at the beginning of this project or make hair as I have done below:

1) Use a piece of felt similar to the colour of the peg or the colour of the hair. Cut a small rectangle about 1.5m long by 0.5cm.
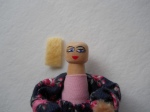
2) Choose the thread colour for the hair. I have used an embroidery cotton but you could use wool or silk or anything else that takes your fancy! I have chosen pink! Wrap the thread around four of your fingers about 10 times. Widen your fingers if you want longer hair, wrap around less fingers for shorter hair.

3) Remove the wraps from your fingers and flatten

4) Put some glue on one side of the piece of felt, and glue the threads to the felt in the centre. Use a craft glue


5) You can work a backstitch along the centre if you like to look like a parting in the hair. This will also ensure the threads stay in place. Use a thread the same colour as the hair.
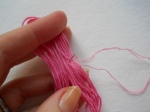
    

6) Turn the hair over and put some glue on the back of the felt piece.


7) Glue to the head and hold in place until dry. Tie the hair in bunches, plait (braid) the hair or leave loose!
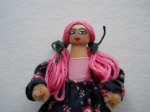
    

The finished doll:


This is a quite basic doll, and is a great point from which to develop other dolls. We will look at accessories and more complicated doll clothing  in future posts, but in the meantime, why not experiment for youself?

I would love to see pictures of any finsihed dolls! You can e-mail them to me here:

dollypegdoll@yahoo.co.uk

Dolly Peg project – Lesson 4

The arms:

1) Cut your pipe cleaner to the required length (about 11cm)

2) Cut your fabric for the arms a little bit shorter than the pipe cleaner and twice the width that you want the finished sleeves to be (mine measured about 5cm/2 inches wide full width)

3) Fold the fabric in half, right sides together and pin along the length of the seam to hold in place like so:

4) Work back stitch along the seam close to the edge in a strong sewing thread of similar colour to the fabric to make a tube.

5) Turn the tube of fabric the right way around (use a pair of thin pliers or tweezers to help you). Fold the ends of the tube under to hide the raw edge.

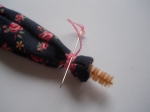
6) Tie a piece of embroidery thread around the end of the sleeve to fasten to the arm. Wrap the thread around several times and finish the thread by threading in a needle and taking back through the wrapped thread. Repeat for the other end.


7) Sew the arms to the back of the bodice gathering up the fabric of the arms in the centre with a running stitch. Make sure you match the centre of the arms to the seam on the back of the bodice.

8 ) Turn over the ends of the pipe cleaner with a pair of tweezers or small pliers to make hands. Bend the finished arms into position:


In the next lesson we will give her some hair….

A Peg Doll class

Sorry for the delay in the next part of the project, I’ve been to the USA for 2 weeks and while I was there I managed to get in a days peg doll class (teaching it that is)!


The above pegs are made by Sheryl and Clara. Snowpeg got a red top hat and the bald peg ladies will hopefully get some hair! It’s great to get some fresh ideas and I’m looking forward to playing with the top hat pegs. We are heading towards the winter, perhaps that will inspire some different ideas….

Next part of the project is coming in the next few days. Get your fabric and pipecleaners ready.