Pink brocade peggie restoration, part two

Ok, you can see from the last post that she is in pretty bad condition!

Pink brocade

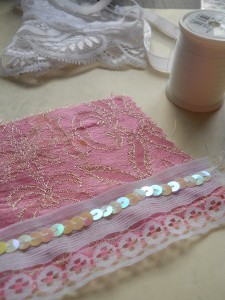
I gave the pink brocade a wash in something pretty strong, but that glue isn’t shifting. So, only thing to be done with it is to cut off as much as possible and hide the rest in seams and under embellishments! I have attached a fairly white band of lace to the bottom:

Cut brocade


The sequins were past being used also, so I found some nice iridescent white ones and sewed these over the ribbon:

New brocade


The skirt will be sewn together down the end and gathered at the top ready for re-fitting. Next thing to sort is the wooden peg!


Another UFD (unfinished doll)!

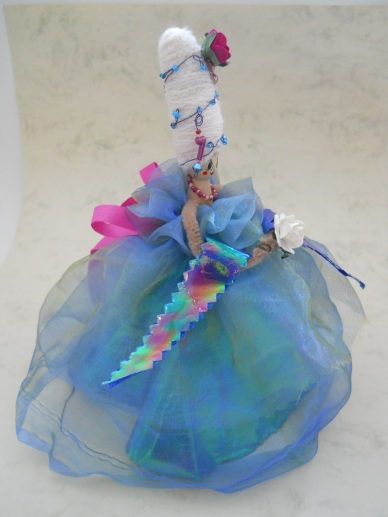
Clearing the decks of those little pegs that have been hanging around with no clothes on, or no faces etc. This one was going to be Marie Antoinette but I only got as far as the hair! I was rather instinctive with this one and made a rather fantastical dress up instead! It’s a bit mad but quite good fun…

Image

Image

A new dolly peg…

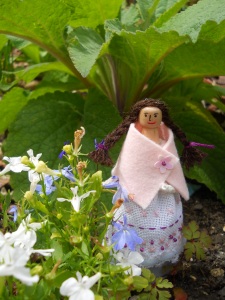
Or rather a finished one! Time for a spring clean and to finish those peg dolls started but for some reason side lined to the work-in-progress pile. All she needed was a face, hair and arms. Oh yes and a lovely big daisy to ponder over! This fabric appears in another doll on this site, can you spot which one? Another view of her:

Geisha

So I got all of my dolls out over Christmas and gave them a bit of a sort. Amongst them are some of the first ones I made including this Geisha doll:

The design is a fairly simple one: The fabric is wrapped around the body in a tube and sewn up along the back, and the sleeves are rectangles sewn up along one edge and a pipecleaner threaded through. I made another tube in pink and tied it around her wasit creating two loops which I sewed into place:

I used cotton embroidery thread for the hair which I glued to her head in spirals. I made a bun in the same way and added lengths of wire for her hair ornaments.

Some drops of beads sewn on to the front of her hair finished her off nicely!

A Christmas Angel peg project

Well, it’s been a long time since I managed to post a project so a good time for a new one and a seasonal one at that!

This lovely little festive angel is very easy to make, just follow the instructions below. Why not add our own embellishments to make her unique?

You will need:

Wooden peg, Gold fabric, Gold card , Gold thread, sequins/beads/embellishments/glitter, thread for hair, glue

1) Sand down the peg if preferred. I also varnished mine (you can use clear nail varnish) to make her last a bit longer.

2) Apply face transfer or draw on a face with felt tip pens. Try to make her look angelic!
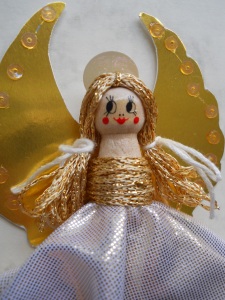
3) Cut a circle of gold fabric. The diameter of the circle should be about twice the length of the peg. Find a plate to draw around or use a compass. I cut mine with pinking shears to make a crinkly edge. I also found another type of gold fabric so I cut another piece to add layers to her dress; you could use silk or organza if you have some.

4) Cut a small hole in the centre of the fabric circles. The easiest way to do this is to fold the circles in half, then again, then again and snip off the point.

5) Slip the fabric onto the peg through the hole in the desired order. Pull one slightly further down than the other so you can see the layers. I secured the underneath one in place with a dot of glue.

6) Wrap a gold thread (or colour of your choice!) around the body and over the raw edge of the top skirt. Finish off by tieing, glueing or sewing into place.

7) Wrap the thread for the hair around all four of your fingers about 5 times (more for a thinner thread). Slip off your fingers and tie around the middle with a piece of the same colour thread. Put some glue on the head of the peg, wait for it to go tacky then stick the hair onto the head. I separated mine into two at the back and tied them into bunches with a white thread.

8 ) Cut out one wing shape in paper. Place it onto the back of the gold card and draw around it. Flip the design over and draw around it again so you get two wing shapes that are mirror image of each other. Cut them out of the card carefully. Glue them onto the back of the body of the Angel.

9) Embellish your angel! I added a large sequin for her halo, glued sequins onto her wings and added a gold flower to her dress. Why not try some glitter for a really festive sparkle!

10) She’s finished!!!!

Post your finished angels here! Send you images to: www.dollypegdoll@yahoo.co.uk and I will add them to the gallery page. You can buy peg doll making materials, including pegs and transfer faces, from my website. Visit here: www.sarahhomfray.com/myshop and click on the peg doll category.

Well travelled peggies

Thank you to Ann who sent me these little peggies all the way from San Fransisco! I wonder if they have made it back home again?

New peg doll kits

This little peg is now available as a kit. Choose from four different colour ways and embroider the apron yourself! Buy now from my online shop.


Available in the following colours: Red gingham, Blue gingham, Green gingham, Pale blue with white spots

Your kit provides everything you need including cotton print fabric, embroidery threads, 25 count linen, needle, face transfers (two just in case!), pipe cleaner and comprehensive instructions.

Twin trouble

Being a twin myself, I was delighted to open up the latest collection of dolls to land on my door mat, and find these twin peggies inside!

Ok, I know they are just two of the same doll, but it pleased me none the less!

Fortune teller

This unusual doll came in a lot of dolls. I loved the skirt and as my interest is in peg dolls, I thought I would turn this one into a Gypsy fortune teller. I dismantled the doll carefully in order to be able to reuse as many parts as possible:


I had some plastic pegs made especially for peg doll projects and have never tried them so I thought I would use one for this doll.  This is the finished result:


I made a bodice out of satin ribbon and replaced the skirt and the beaded waist band from the original doll. I also re-used the head scarf adding on jump rings for earrings. I gave her a paper flower to hold in new pipe cleaner arms. The face features are moulded into these plastic pegs so I bought the facial features out with acrylic paints.